
Inkjet Transfer to Wood
Although there are a number of ways to transfer printouts of your design to wood that require a lot of time as well as a laser jet printer, this process is very quick and uses adhesive label sheets with an ink jet printer instead. Watch the short tutorial below to see how I made this project.

What you’ll need:
Adhesive labels for an ink jet printer
Wood
Sandpaper
Ink jet printer
Squeegee or card (optional)
Spray lacquer (optional)
Mod Podge (optional)
I used this image from Pixabay to make this project and you can download it from it’s original source here if you would like to use it too. Thank you to contributing artist Ridderhof for submitting it.

First you will want to get some adhesive labels for shipping or for putting on jars like these ones. I chose this type because there are less labels to peel off, but you can get sheets with any number or size of shipping labels.
Then you can get your piece of wood ready by sanding it so it is smooth. I used birch wood but any wood will work as long as it light enough for the design to show up.

Peel all of the labels off of the sheet including all of the adhesive paper that was around the labels. You will be printing on the shiny side that the labels were on.

If you are using a design that has letters in it, you need to use a program to make a mirror image to make the words backwards, otherwise they will turn out backwards on your piece of wood instead. I used the mirror tool on Rapid Resizer to reverse the image.


The shiny side that the labels were on is the side you are going to print on, not the back side so figure out which side your printer prints on. If you don’t know, just scribble on a piece of paper and put it in the printer and then print something (maybe just a single word to save ink) and see which side your scribble showed up on. Then you will know which way to put the label sheets in so that your image prints on the shiny side.
Some printers crunch up the paper if there is only one sheet in the printer tray, so you may need to put several sheets of label paper in the tray with the labels all removed.

When you are ready to print your design, go to the print settings and be sure that grayscale is off so that it doesn’t print in black and white. You can also choose the Print quality to be high so that it lays down more ink than it will in a draft or regular setting.
It will look very faded when it prints out but there is actually a lot of ink on the page. Be sure not to touch it at all or it will smear.

Place it ink side down on the wood. The most important thing is to not move it around at all so be sure you have it centered where you want it before it touches the surface.
Hold it down with one hand while you work or carefully tape it across the top along the border where nothing is printed. You can also put tape along the top of the backside of the paper before you even place it on the wood so that you can easily smooth the tape down.
Once the ink side is securely face down on the wood press down on the back of the page, making sure to transfer every part of the image. Smooth it down evenly and firmly with your hand wherever the design is printed. You can also press down with a folded paper towel or a squeegee, or a card from your wallet which is what I used. Be sure to get all of the air bubbles out. Lift the paper carefully and your design is on the wood with no waiting time!
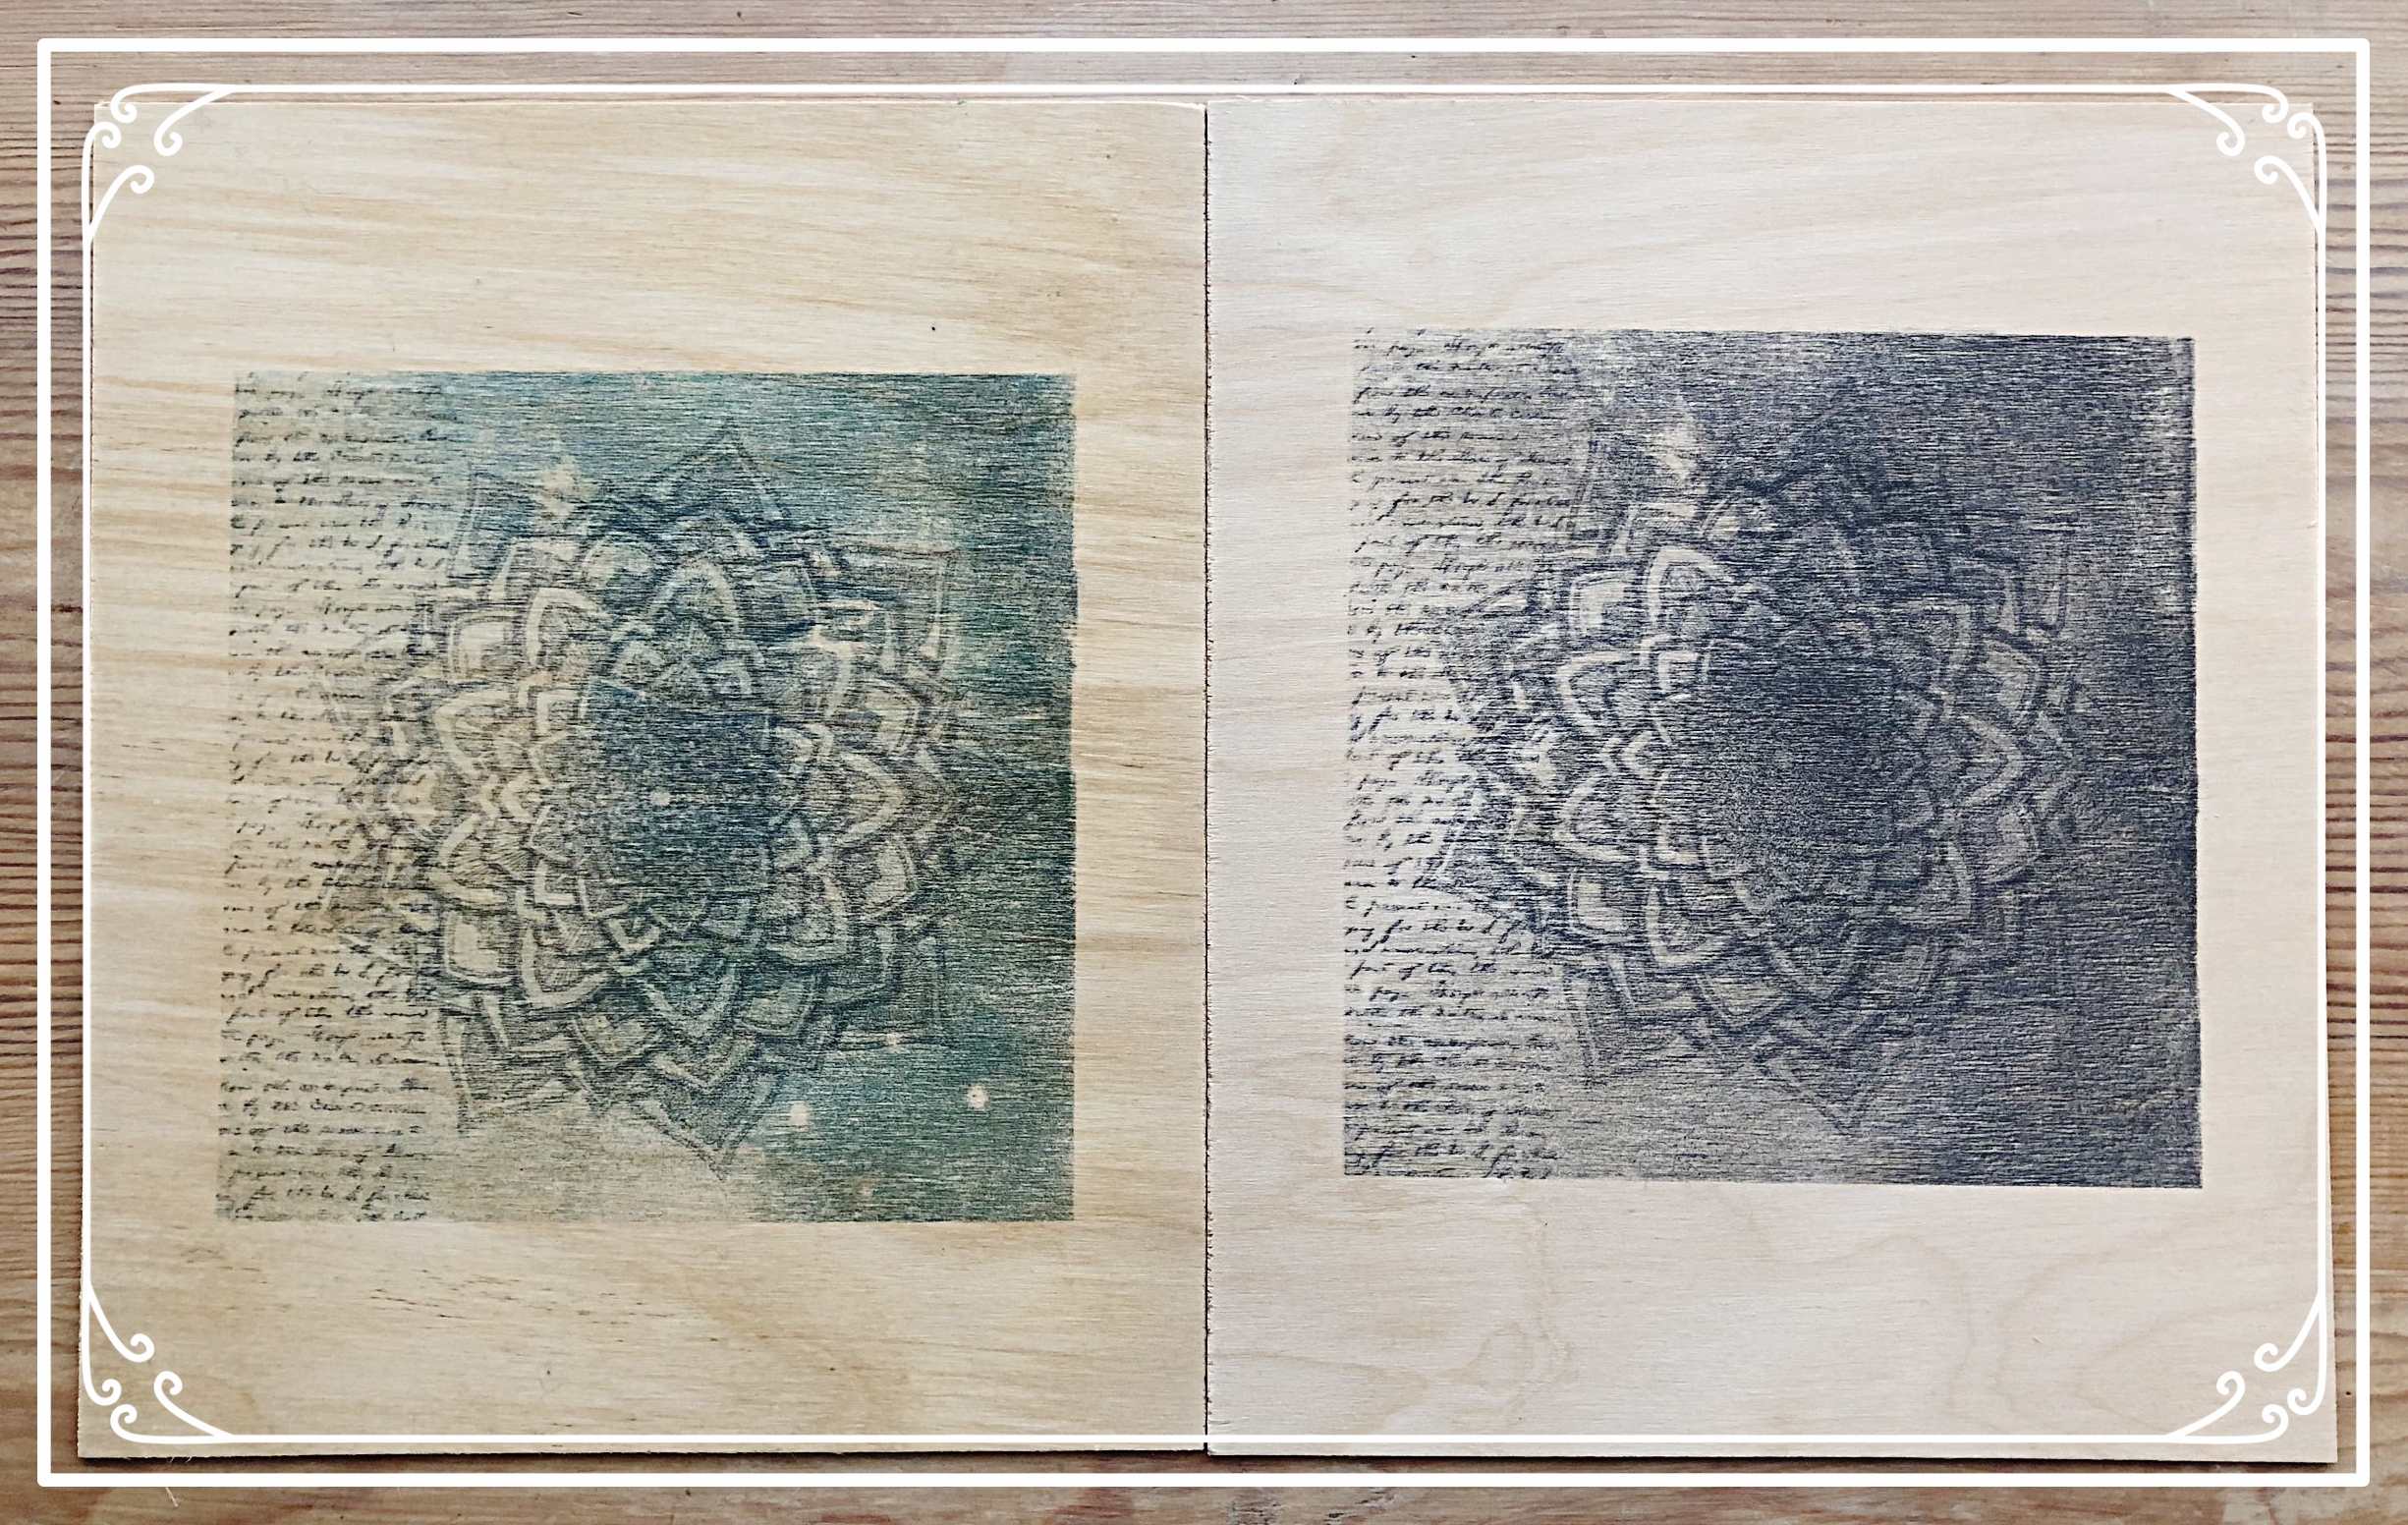
If there are mistakes or you don’t like how it looks you can just sand it off and try again. Here is the black and white one that I printed by accident, but I used it anyways and liked the way it turned out.

You might want to apply a lacquer spray to protect it at this point. It is better to use a spray so that it doesn’t smear the ink, but do this where there is good ventilation. It will make the wood smell for a day or two. If surface remains rough once it is dry, rub it down with a brown paper bag as this smooths the surface without lifting the clearcoat and then apply an additional clearcoat.
You can also try using Mod podge to seal it but wait for 24 hours and try to use the lightest brushstrokes possible so that it doesn’t smudge the ink. You might want to try this out on a practice piece first

Send us a comment below if you have any questions, and if you make a project using this method then feel free to share it with us.

Happy Creating!
~Melissa