Crafting Stencils for Pyrography Projects

Creating a stencil for your wood-burning projects is a great way to ensure accuracy and consistency in your designs.
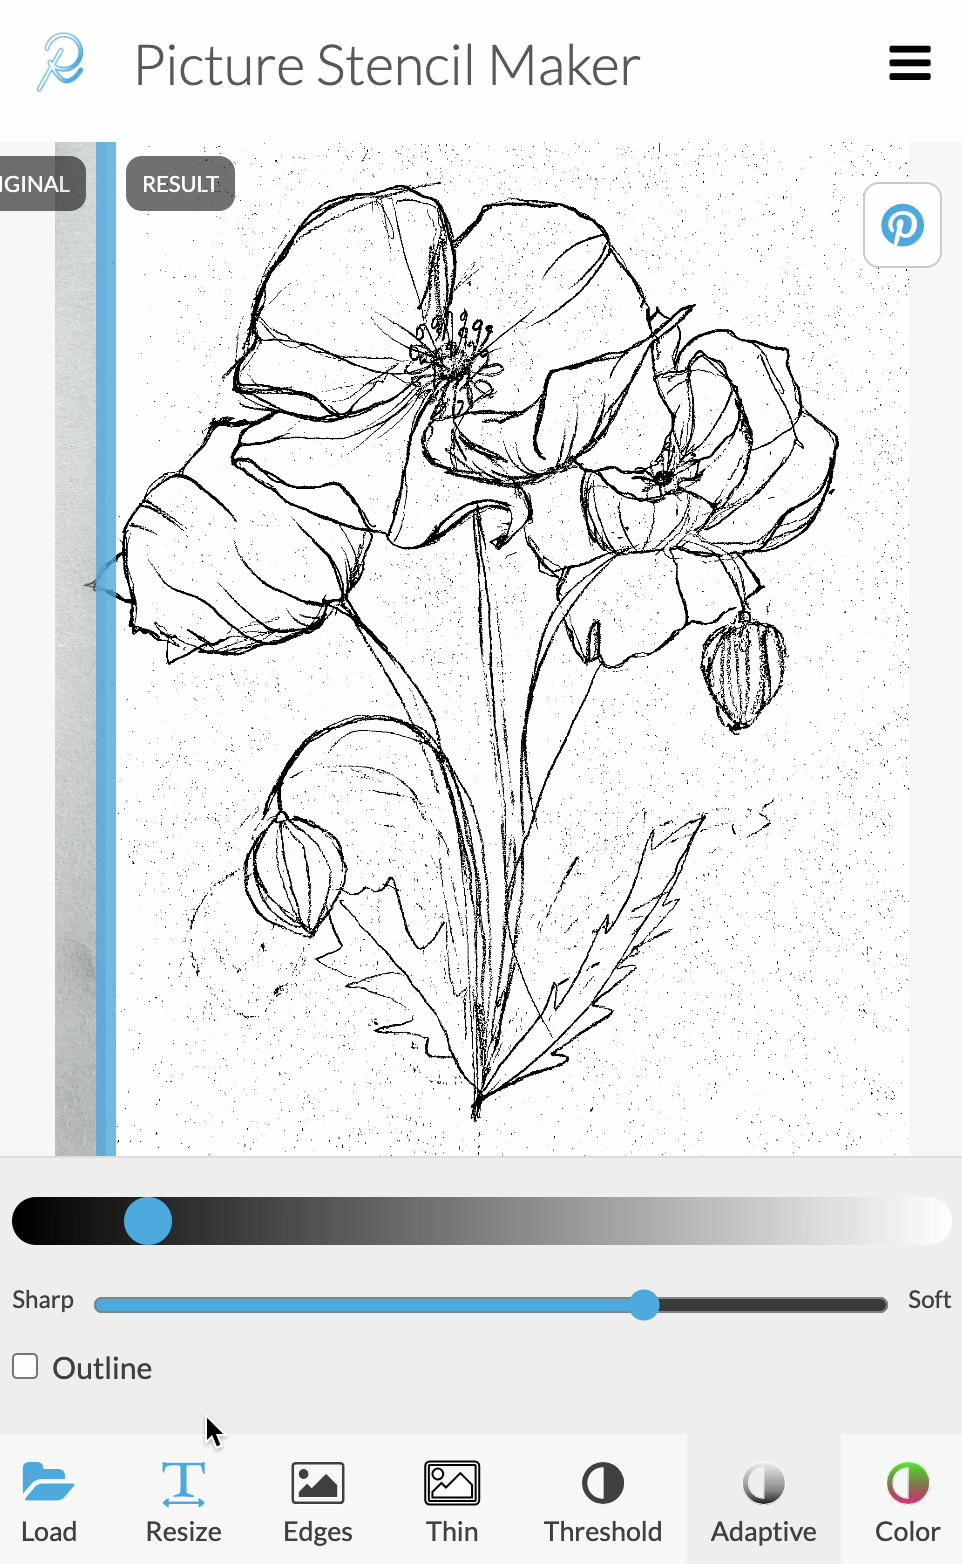
With Rapid Resizer, you can turn photos into line drawings using the Picture Stencil Maker, or define fine lines for easy tracing like I have for this project.
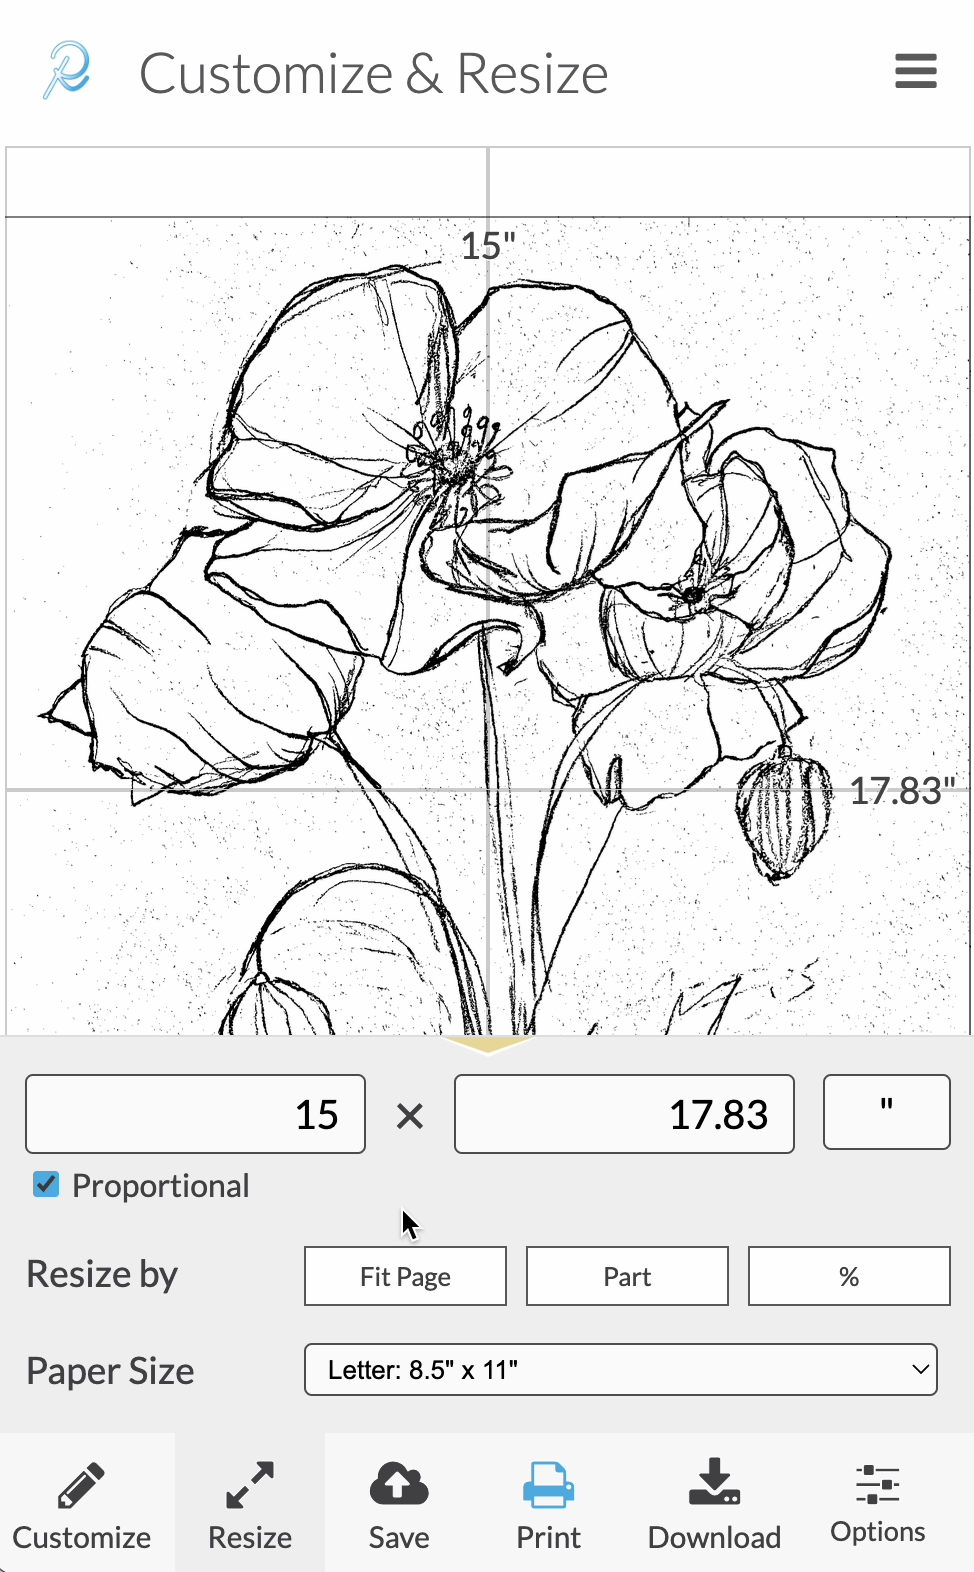
Accurately resize the design before printing to ensure it perfectly fits on your medium of choice.
Choose or Create Your Design: Decide what design you want to burn onto your wood. This could be anything from simple shapes to intricate patterns or even text.
Select Your Material: You'll need a material that's suitable for wood burning such as basswood.
Create your Stencil: Take a photo of the design you wish to turn into a stencil from your sketchbook and load it into the Picture Stencil Maker. Experiment with the different customizations until you get the desired effect.
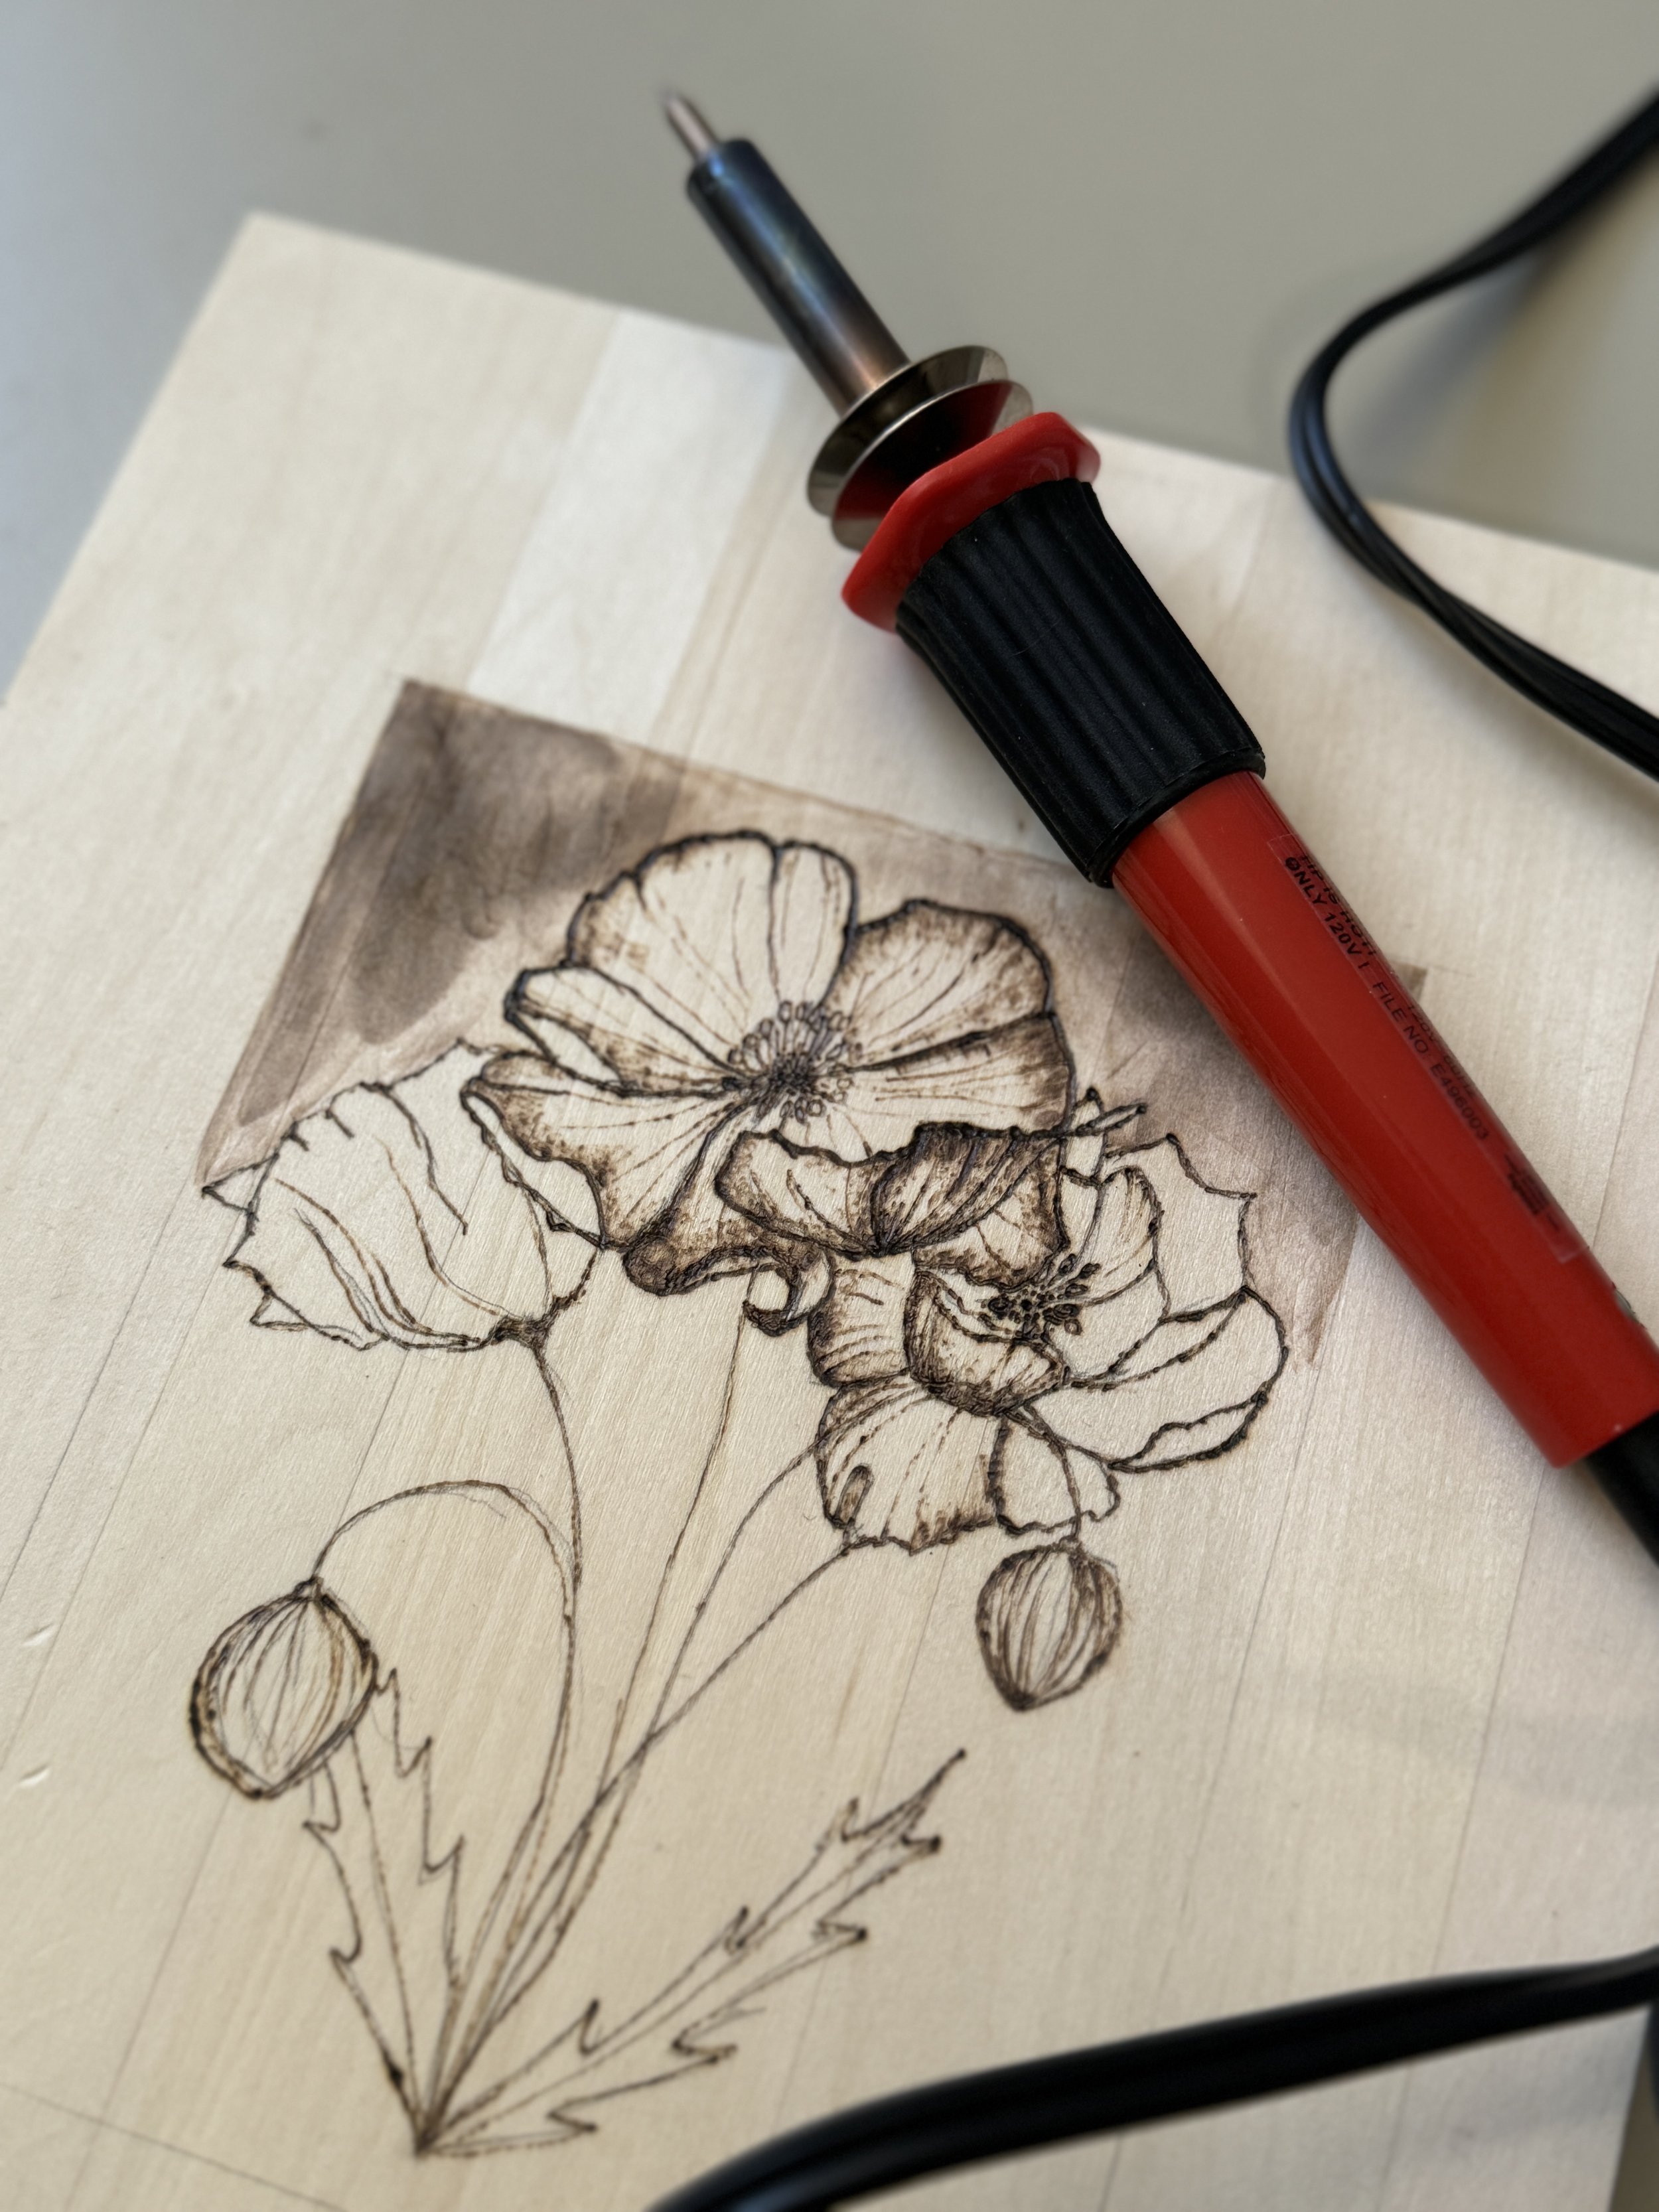
Transfer Your Design: Once you have accurately resized your design it’s time to print and trace. I’m using carbon paper to transfer my design onto the basswood. If there are any areas where the tracing isn't clear, you can touch them up by hand.
Test Your Wood Burner: Before using your burner on your wood project, it's a good idea to test it on a piece of scrap wood. This allows you to make any necessary adjustments and ensures that your stencil produces the desired results.
Wood Burning: Now that you have your traced design on the wood, you can begin wood burning. Follow the lines you traced with your wood-burning tool, adjusting the temperature and pressure as needed to achieve the desired depth and shading. You can also experiment with different tips for your burner. Just make sure it has completely cooled between changes!
Finish: Once you've completed the wood burning, you can finish your project with varnish, stain, or paint to protect the wood and enhance the appearance of your design!